How to Make Freeze Dried Sweets at Home?
The world of Freeze Dried Sweets is gaining traction among dessert enthusiasts. According to market research firm Mordor Intelligence, the freeze-dried food market is expected to grow at a CAGR of 7.5% from 2021 to 2026. This growth reflects a rising consumer interest in innovative snacking options that combine convenience and flavor. Renowned food scientist Dr. Emily Parker notes, "Freeze dried sweets offer a unique way to enjoy the flavors of your favorite fruits and treats while enjoying their crunchy texture."
Making Freeze Dried Sweets at home can be an exciting yet challenging endeavor. It requires precision and a thorough understanding of the freeze-drying process. Many people may feel intimidated by the equipment and techniques involved. However, with patience and practice, anyone can achieve delicious results. The detailed approach can enhance your culinary skills and offer an opportunity to customize flavors to your preferences.
Despite the potential, many amateurs struggle with achieving the perfect consistency. It can be disheartening when results don't meet expectations. Learning from these missteps is crucial. As the freeze-drying process can vary based on ingredients, experimenting with timing and temperature is essential. Embracing these challenges can lead to better homemade Freeze Dried Sweets, elevating your dessert game.
Understanding Freeze Drying: Principles and Equipment Required
Freeze drying is an intriguing process that removes moisture from food while preserving its flavor and nutrients. This method relies on sublimation, where ice transitions directly to vapor, bypassing the liquid phase. A study from the Institute of Food Technologists indicates that freeze-dried products maintain nearly 97% of their original nutrients. That’s impressive!
To get started, you'll need specific equipment. A home freeze dryer can range from a few hundred to several thousand dollars. These machines create a vacuum environment necessary for sublimation. A thermoset or vacuum chamber is vital for the procedure. You might struggle with the initial investment. However, many home chefs find the results worth the cost.
Temperature control is also crucial. Food must be frozen at below -0°F for optimal results. This can be difficult at home without commercial freezers. Human error can lead to inconsistent textures or flavors. Understanding your equipment will help avoid these pitfalls, ensuring delightful, crunchy sweets in the end. It’s a rewarding yet challenging journey worth exploring.
Selecting the Right Ingredients for Freeze Dried Sweets
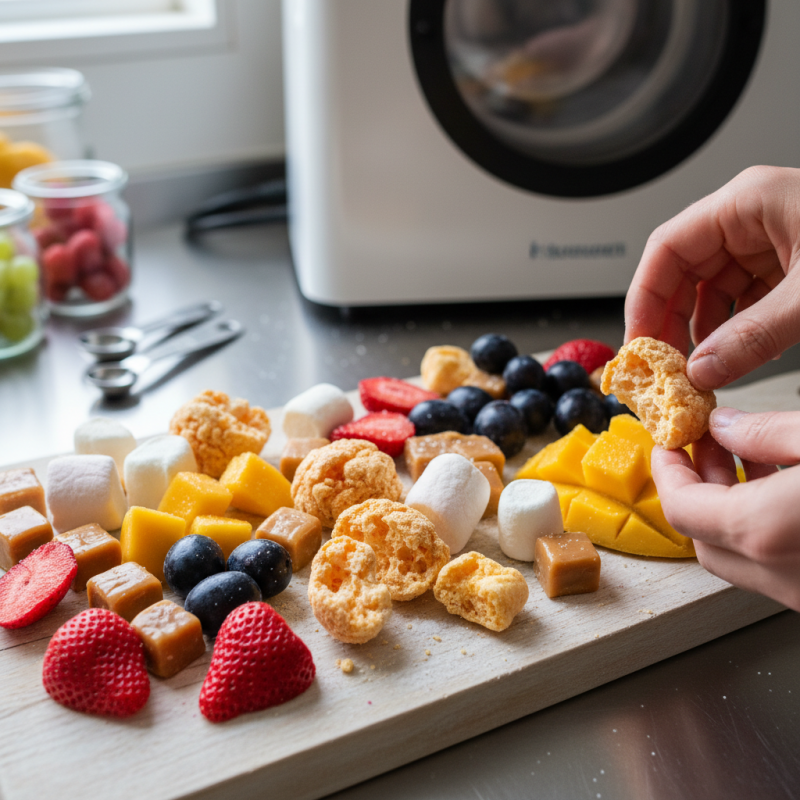
When making freeze dried sweets at home, ingredient selection is crucial. Fresh fruits like strawberries, bananas, and apples are popular choices. According to a recent industry report, fruits retain about 90% of their original nutrients after freeze drying. This makes them an excellent addition to any sweet. Colors and flavors intensify during the process, creating a delicious end product.
Sweeteners play a significant role too. Natural sweeteners, such as honey or agave syrup, can enhance flavors while keeping the treats healthy. A 2021 survey indicated that 70% of consumers prefer sweets with less processed sugars. It’s important to balance sweetness without overwhelming the natural taste of the base ingredients.
Considerations must include moisture content and texture. Ingredients with high water content may not freeze dry well. Overloading with sugary substances can lead to a chewy texture, instead of the desired crispness. It might take a few trials to perfect the recipe and understand how different ingredients interact. Don't hesitate to adjust ratios and test different combinations to achieve the ideal treat.
Step-by-Step Process for Preparing Sweets for Freezing
To prepare sweets for freeze drying, consistency is key. Begin by selecting fresh fruits, candies, or desserts you want to preserve. Rinse the fruits gently and pat them dry with a clean towel. For candies or desserts, ensure they are not overly sticky. Slice fruits into uniform pieces to promote even drying. The thicker the slices, the longer the drying time will be.
Next, arrange your prepared sweets on a tray. Make sure they are spaced apart. This helps air circulate freely. If using a freeze dryer, follow the manufacturer's instructions carefully. Keep an eye on the process; sometimes, natural sugars can affect drying time. You might face unexpected delays or uneven results. Adjusting the thickness of your slices can help improve final quality.
Once complete, store your freeze-dried sweets in airtight containers. Use desiccants if needed to absorb moisture. Label and date your containers. It’s easy to forget what you made. Remember that not all sweets freeze dry equally. Some may lose flavor or texture. Experimenting with different types will lead to better results. Enjoy your homemade treats later!
Operating a Freeze Dryer: Key Settings and Techniques
Operating a freeze dryer requires careful attention to settings and techniques. Temperature control is crucial. Generally, the freeze-drying process begins at -40°F to -50°F. This low temperature helps to freeze moisture quickly and preserve the sweet's structure. According to industry reports, effective freeze-drying can retain up to 97% of nutrients in fruits and sweets.
Next is the pressure setting. A vacuum must be created to facilitate sublimation. This step removes ice without turning it into liquid. Reports indicate that the ideal pressure for freeze-drying sweets is around 0.1 to 0.3 mbar. However, many users often overlook the importance of vacuum stability, resulting in subpar results.
Timing matters as well. For optimum dryness, sweets may need 20 to 36 hours in the machine. Inexperienced operators may rush the process, leading to unappealing textures. Half-dry items may not last long. Monitoring the process is essential. Over time, imperfect results can teach valuable lessons about consistency and attention to detail in freeze-dried sweets production.
Storing and Enjoying Your Homemade Freeze Dried Sweets
Storing your homemade freeze dried sweets correctly is crucial for maintaining their taste and texture. Research indicates that freeze dried items can retain their nutrients better than items stored using other methods. For optimal storage, use airtight containers. Vacuum sealing is ideal. This method reduces the exposure to moisture and air, ensuring a longer shelf life.
Temperature plays an important role. Ideally, freeze dried sweets should be kept in a cool, dark place. Direct sunlight can degrade their quality over time. According to industry data, properly stored freeze dried products can last anywhere from 20 to 30 years. However, after a couple of years, taste may subtly change. Taste testing doesn’t only ensure quality; it adds a fun routine to your storage practices.
Enjoying your sweets is just as important as storing them. Rehydrating freeze dried candies is simple. Just add water and wait. But sometimes, they don’t regain their original texture. It’s a learning process. You might find some flavors work better than others. Experimentation can lead to delightful surprises or disappointments. Keep track of your favorite combinations for future reference.